A whispering PC .....
What motivated me to make this page: I have a genetic defect .... I dislike unnecessary sounds.
(what a polite way of saying that)
Huh ??
Yes, you heard me: unnecessary sounds.
I don't like the sound of a Kango-hammer, but I don't hate it. It's noisy, agreed, but it's noisy because it's doing something !! It's breaking concrete .... what else could you expect ?
What I do hate, is a humming fridge, f.i. Actually, any 50Hz-humming device. All because of bad design or building-skills.
This page is about the sound of the fans in a PC-housing, making noise,
pumping 5 liters of air per second through the cabinet, sucking in all
dirt, doing a better job than the vacuumcleaner,
dustwise,
and for what ?? NOTHING !!
Just idling, eating it's nose
out. Or handling the amazing two keystrokes per second (average) I manage to do ...
And because of that overdone airflow, the amount of dirt is stunning:
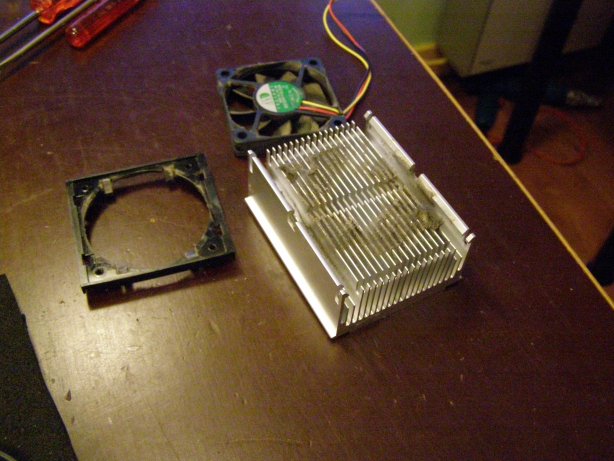
The small cooler above is a pretty good one: double ball-bearing and not as noisy as other small ones.
But pumping so much air, cooling the P4 @1800MHz to ambient + 3°
(irony-flag is on), building up so much dirt that the 3° become
13° very soon etc etc.
If you are willing to spend money, it's not very hard to make your PC less noisy.
So far I have had very good
experiences with Zalman. And I don't mind to spend extra money on a
quiet PowerSupply ...... But I am not
always in the position to spend money: some PC's that come to me
(Plons, also known as "Teh Great Collector" in my family) are too old
for a big overhaul. So that's where these tricks come in:
Home-made smart fancontrollers
An acceptable temperature of the
heatsink is 40°C. Chip-temperature will be a bit higher, but rest
assured: the chip will be happy.
And by allowing that 40°C,
it needs just a small breeze to keep it at that temp. This small breeze
carries less dirt than when full blown, therefor the dirt-builup will
be less, so it will work quiet for a long time, and at the moment you
think: good grocious, it's making a lot of noise, it's time to clean
the cabinet out.
For this P4 PC, for my brother, I made an analog fan-control:
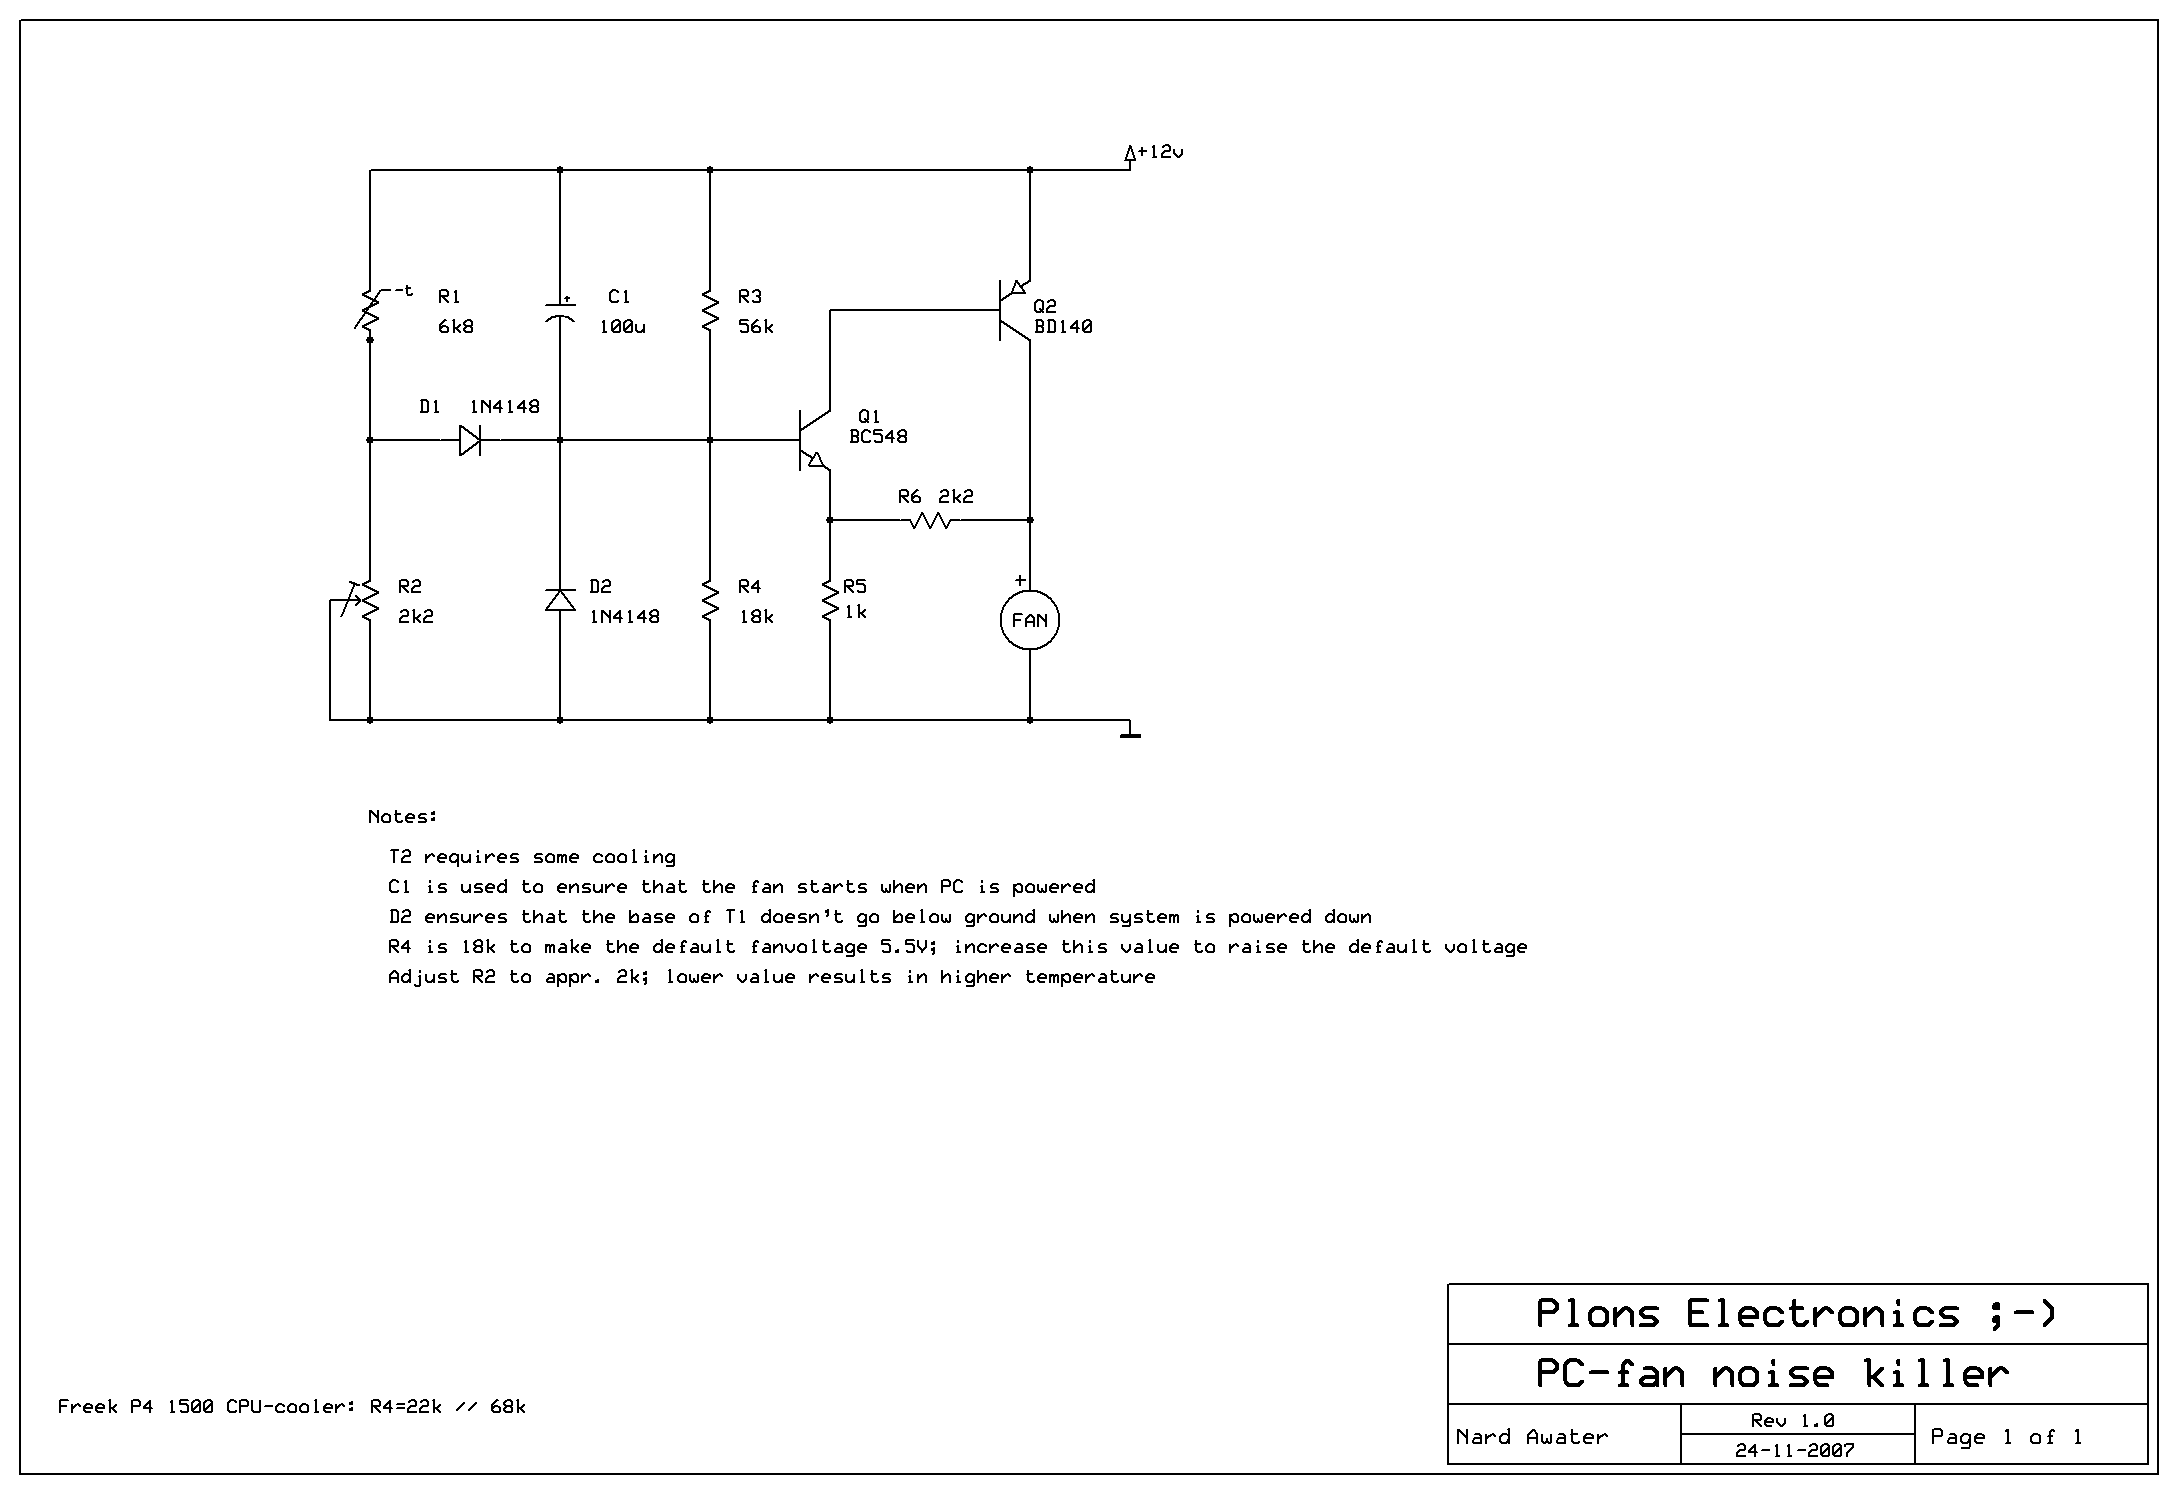
Use Right-Click to view it, or Right-Click -- Save As to store. It's in png-format. Here is the schematic in .sch-format. You can open or modify it with ExpressSch, that you can download at http://www.expresspcb.com
Built on Vero-board
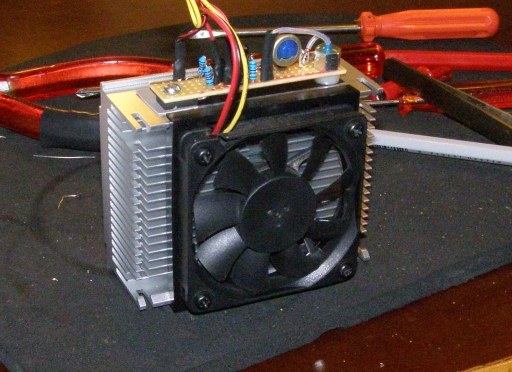
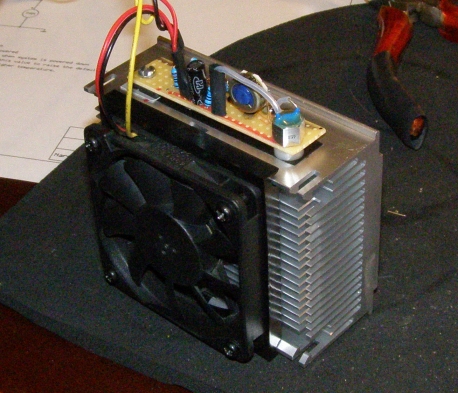
The NTC is on the right; the BD140 is on the left, at the copperside of the PCB.
Since this controller is analog, it needs a little bit of cooling. And as the
heatsink for the P4 was close, it was used for this purpose; Don't
forget to use electrically isolate the transistor from the heatsink.
Each time I needed a fan-controller, I built one on Veroboard. An etched PCB would come in handy, so I designed one

The layout can be viewed and printed using ViewLayout50
Download ViewLayout50 and put it on
your desktop (don't need an
install), then download the layout, put it on your desktop as well,
start ViewLayout50, do File --> Open, select FanController.lay. The
viewer doesn't allow you to change the file, just to view or print it.
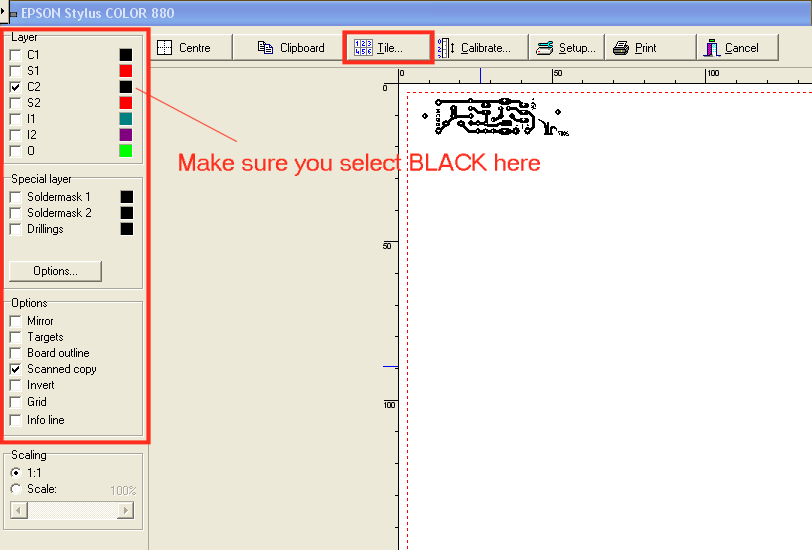
Next, do File --> Print, and set the screen as the capture shows
here. If you want to make more boards , use Tile. The program also
allows you to calibrate your printer. Just take some time to explore
all possibilities.
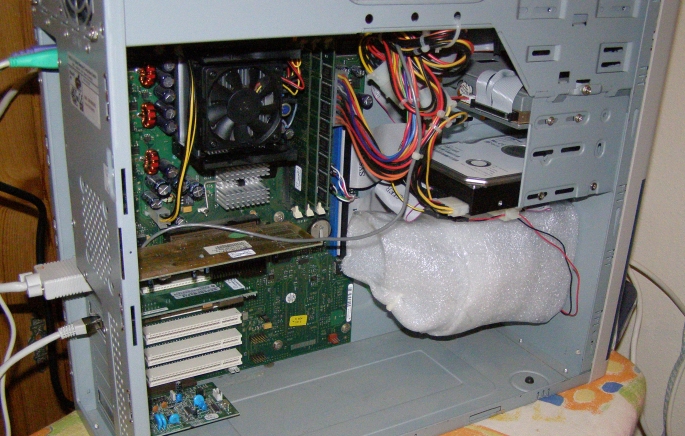
The graphics-card in this PC ran quite hot: not very surprising,
considering that the heatsink is pointing down, and there is hardly any
airflow there. It took just a bit of packaging material to construct an
air-duct that brings the fresh air, taken from the frontpanel, to the
graphics card. The frontpanel-fan is running from 7V: instead of using
ground as lowside for this fan, I used the +5V: simple trick huh ?
So far the analog fan controller.
Since I started playing around with
SMPS's (Switched Mode Power Supplies), it was a small step to make a
simular device using SMPS-technology.
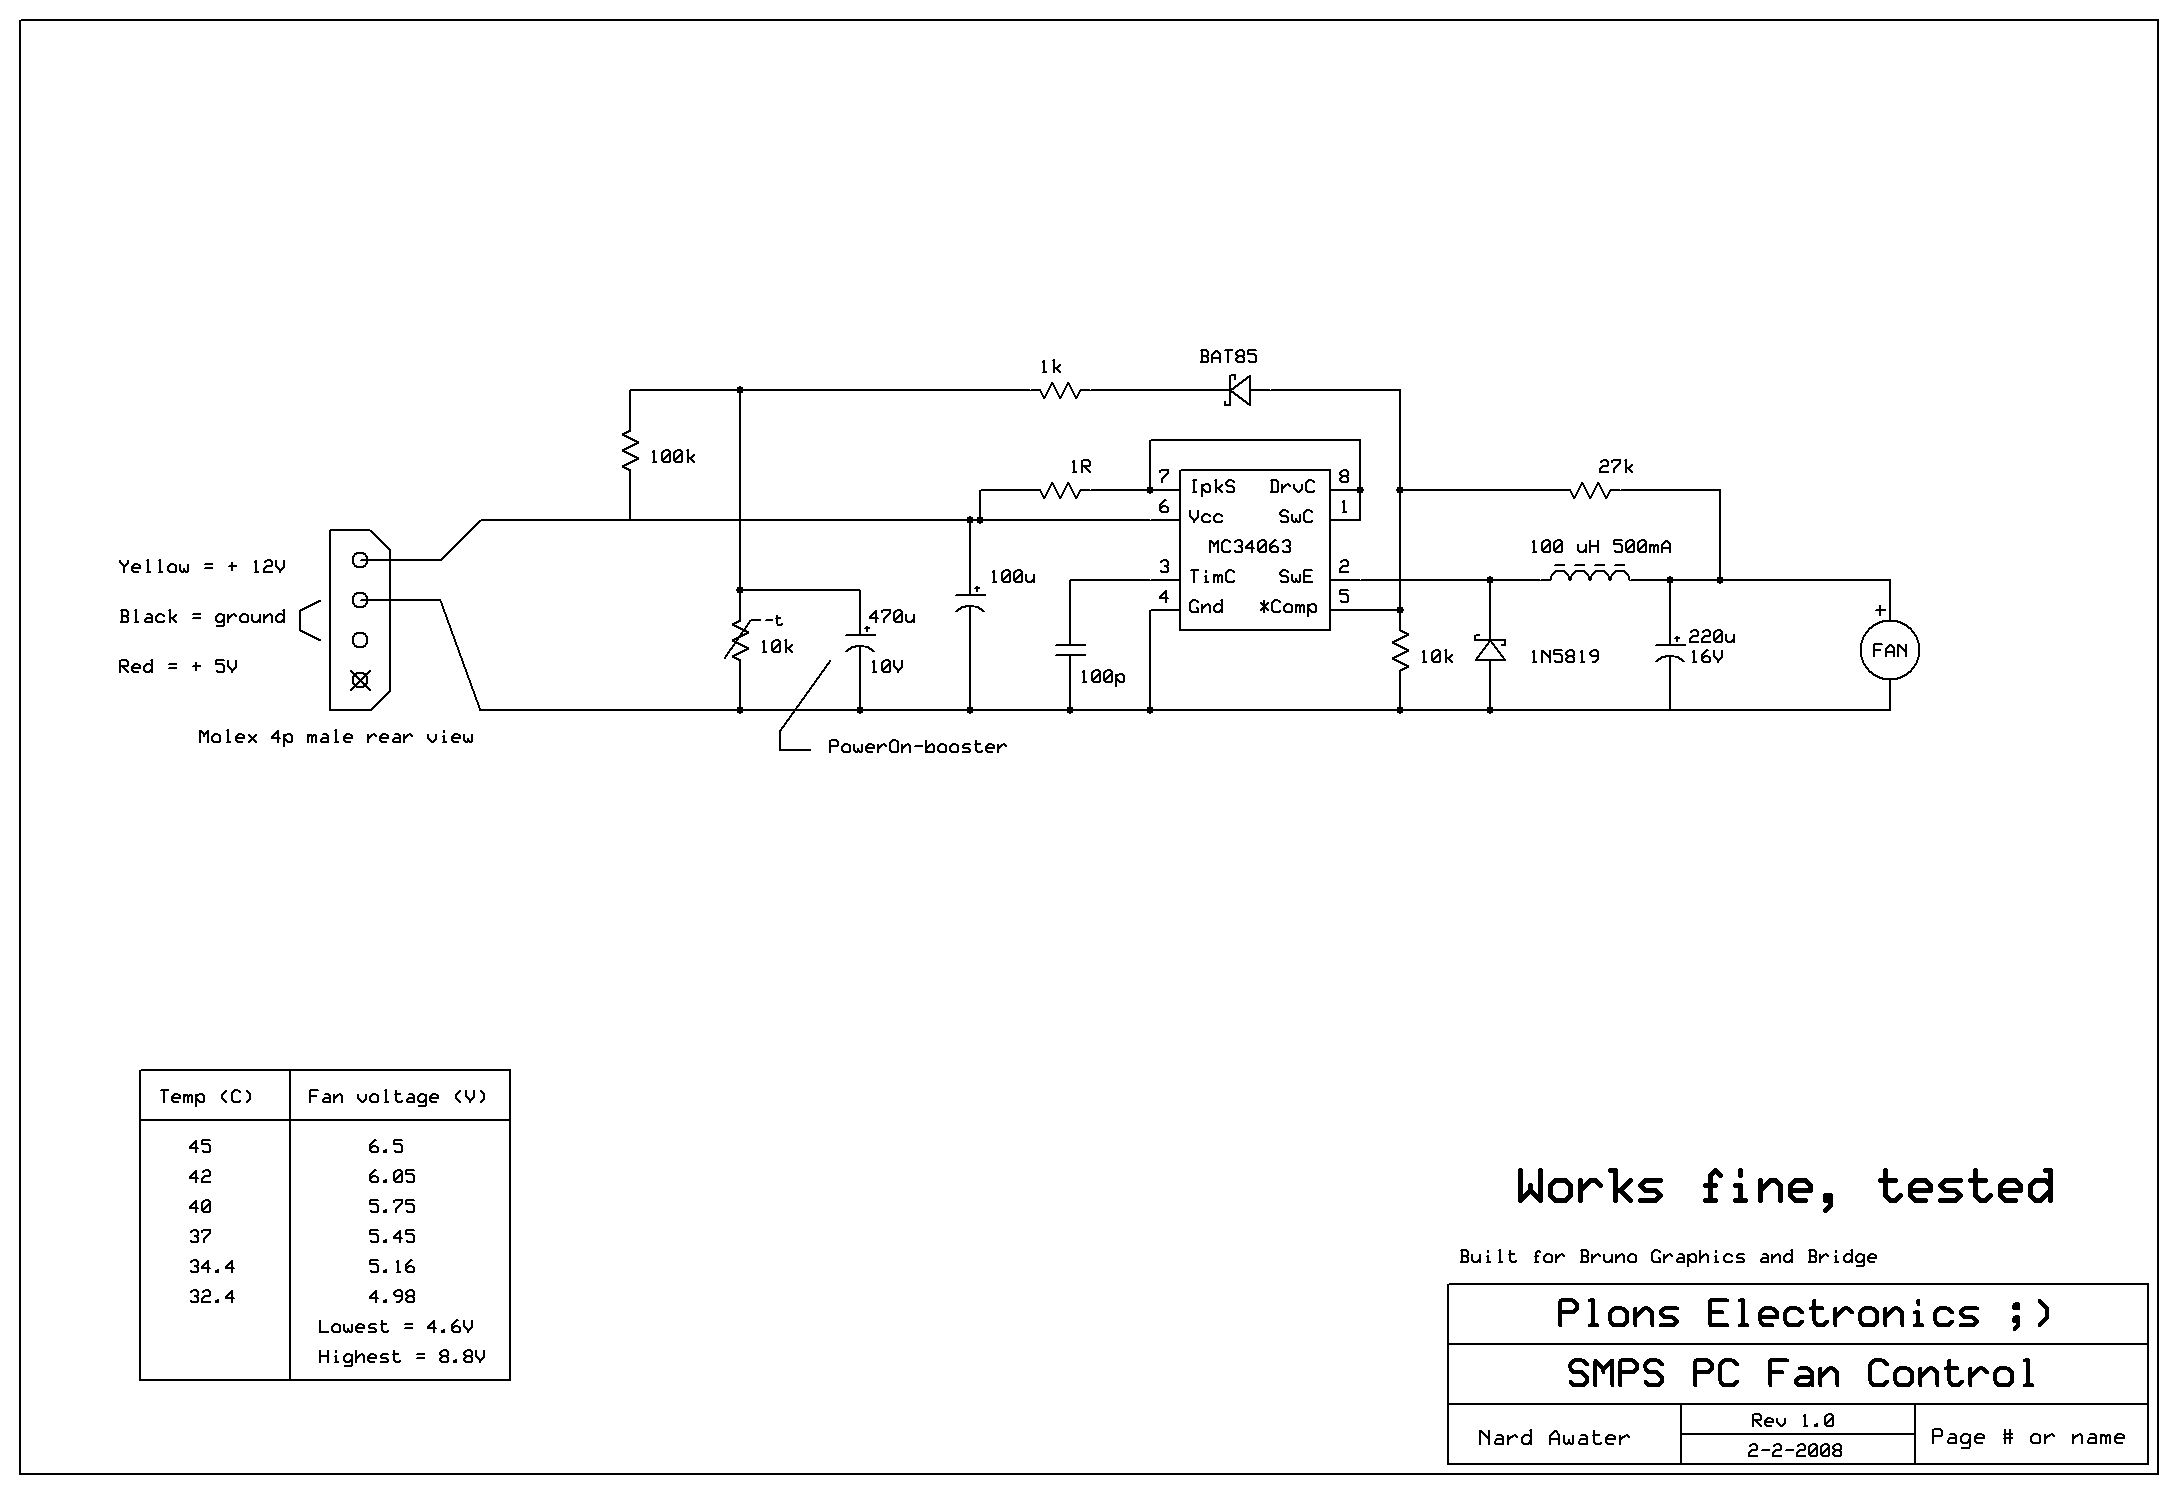
Scematic in .sch-format
And editable with ExpressSch .... but you got that already, didn't you ?
No PCB-design yet for this one, but it won't take long till it's available here.
Some background ..... the breadboard experiment
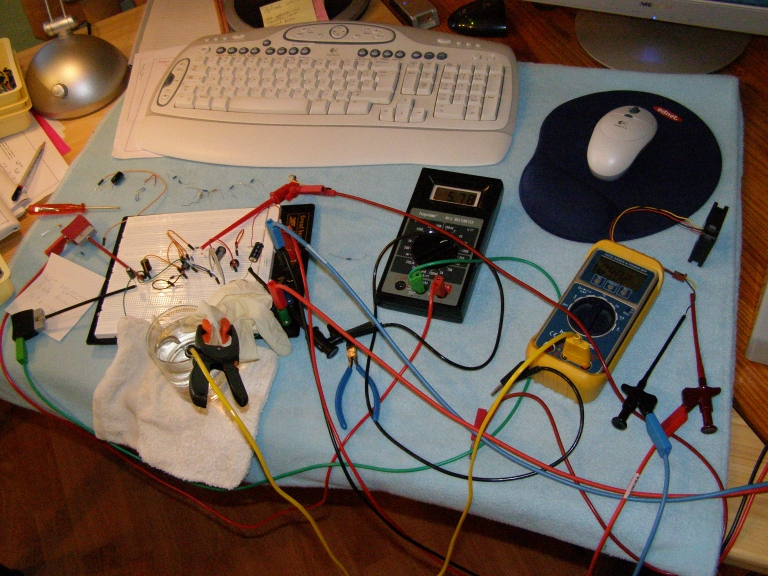
The yellow MM (MultiMeter) measures
the temperature of the water in the glass. The latex glove prevents the
sensor from getting wet. The black MM shows me the fan-voltage.
The controller on veroboard
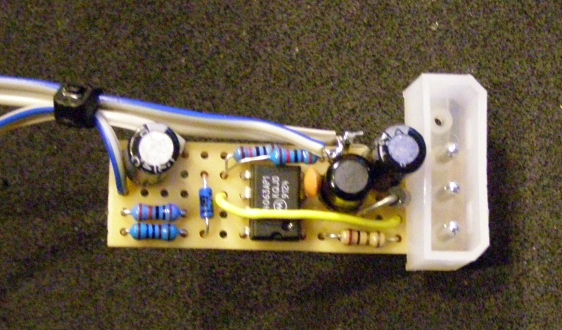
and here how it's used in my new PC:
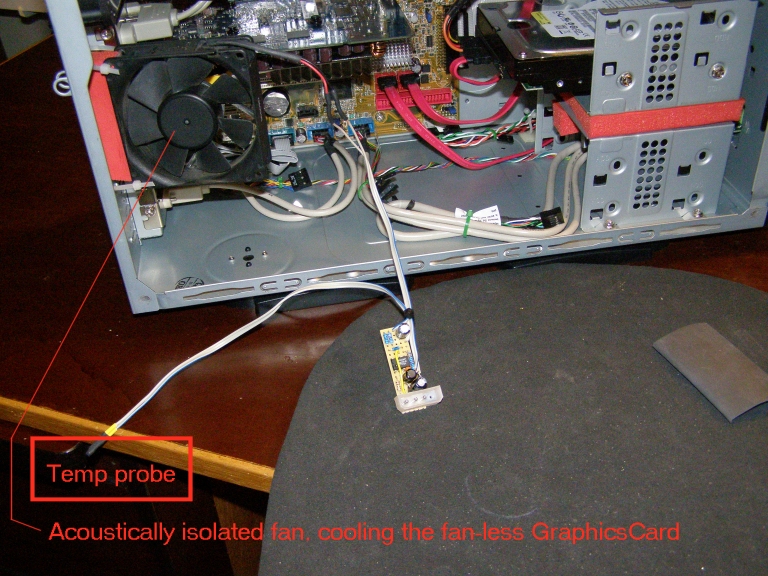
The piece of shrinktubing on the
right was put over the board and connector, and crimped . A cut-out
made the connector accessible again.
Note that the HardDisc (on the right) is mounted in an acoustically isolated subframe :-)
The processor-fan is under MoBo-control, and very quiet : no need to do some tricks there.
The casefan is a 12cm one, properly controlled by the MoBo as well
The PS (Power Supply) is an overdimensioned Corsair 650W with a 12 cm fan. It's almost as quiet as a fanless :-)
The sensor is mounted on the large
fanless heatsink of the Graphics Card: an Asus EN8600GT Silent.
And as a bonus, The SouthBridge of the MoBo is cooled as well.
The End,
Plons, Feb 7, 2008
Note: Genetic, because my siblings suffer from this same disease ;-)


